1. Vue-devtools 확장탭(Vue-Panel)

Vue.js를 개발하면서 반 필수적으로 사용하는 vue-devtools를 사용할 때 Vue Panel(확장탭)이 안 보이는 경우 가 있다.

이는 로컬에 저장되어 있는 파일을 불러오면서 vue-devtools가 not detected 라며 Vue에 대한 파일을 찾을 수 없다고 한다.

이 때문에 조금 골치가 아팠는데, 서칭을 하다보니 다음과 같은 방법을 해결할 수 있었다.


2. Devtools Settings

확장 프로그램 상세설정으로 들어가서 파일 URL에 대한 액세스 허용이 필요함

확장프로그램 상세 설정 창
Vue.js devtools 상세설정

0. Github Alert Email

Vue.js를 연습하는 도중 간단한 webpack-simple 프로젝트를 npm으로 다운로드받아서 테스트 후 업로드를 해보았는데...

git에 push하고 집에 가려는데 갑자기 email 폭탄이 날아오더니, 특정 파일의 취약한 버전이 발견되어 이를 수정하기를 권고하는 내용이었다.

package-lock.json에 작성된 js-yaml 버전이 낮으니 패치하길 권고
package-lock.json에 작성된 minimist 버전이 낮으니 패치하길 권고

이렇게 업데이트 메시지가 나오는 이유에 대해서는 두말 할 것 없이, 당연 취약해서다.

취약한 버전이거나, 버그가 있거나 하여 이를 fix한 버전으로 업데이트하라는 말이다.

그런데 npm install을 수행할 때 package-lock.json에 기재된 버전 정보가 낮을 경우 Security Alert를 Mail로 Bot이 자동으로 보내주는 형태인 것 같다.

이를 해결하기 위해 많은 삽질을 하던 중 다음과 같은 결과가 나와 업데이트를 수행할 수 있었다.


1. NPM Warning Message

npm에서는 자체적으로 audit 기능을 제공한다.

이 명령어를 이용하면 일반적으로 서브 버전의 차이일 경우 해결이 가능하다.

그러나 이 기능을 활용하여 fix 명령어를 입력해보았지만, 크게 변화가 없었다.

이에 대한 명령어와 결과는 다음과 같이 나타났다.

npm audit command

$ npm audit fix

after audit fix command...

 ⚡ root@ubuntu  .../study/study021   master ●  npm audit fix
npm WARN webpack-dev-middleware@1.12.2 requires a peer of webpack@^1.0.0 || ^2.0.0 || ^3.0.0 but none is installed. You must install peer dependencies yourself.
npm WARN webpack-dev-server@2.11.5 requires a peer of webpack@^2.2.0 || ^3.0.0 but none is installed. You must install peer dependencies yourself.

up to date in 4.103s

24 packages are looking for funding
  run `npm fund` for details

fixed 0 of 13 vulnerabilities in 10538 scanned packages
  13 vulnerabilities required manual review and could not be updated

체크해볼 수 있는 취약한 버전으로 webpack-dev-server를 중심으로 고쳐보려 노력했다.

여기서 볼 수 있는 건, 현재 설치된 webpack-dev-server의 버전이 2.x 버전이기 때문에 3.x가 설치되지 않아 직접 dependency를 해결하라는 경고 메시지가 보인다.

정말 아쉽게도 이를 해결하기 위해서는 기존의 npm update webpack-dev-server와 같은 명령어로는 어림도 없었다.


2. Conclusion

위와 같은 버전 차이는 새로 설치해야 하는 문제이기 때문에, reinstall 과정을 수행해야 한다.

reinstall 과정은 다음과 같은 명령어로 수행하면 된다.

reinstall command

$ npm uninstall webpack-dev-server --save-dev
$ npm install webpack-dev-server --save-dev

reinstall result

 ⚡ root@ubuntu  .../study/study021   master ●  npm install webpack-dev-server -save-devev
+ webpack-dev-server@3.10.3
added 219 packages from 168 contributors and audited 10479 packages in 11.716s

22 packages are looking for funding
  run `npm fund` for details

found 14 moderate severity vulnerabilities
  run `npm audit fix` to fix them, or `npm audit` for details
check the version of 'webpack-dev-server'
    "webpack-dev-server": {
      "version": "3.10.3",
      "resolved": "https://registry.npmjs.org/webpack-dev-server/-/webpack-dev-server-3.10.3.tgz",
      "integrity": "sha512-e4nWev8YzEVNdOMcNzNeCN947sWJNd43E5XvsJzbAL08kGc2frm1tQ32hTJslRS+H65LCb/AaUCYU7fjHCpDeQ==",
      "dev": true,
      "requires": {
        "ansi-html": "0.0.7",

1. 외부 접속을 위한 가상 환경

환경

Ubuntu 19.04
VMware


2. package.json 수정

만약 npm run dev로 구동하여 개발할 경우 다음과 같은 방법으로 json을 수정하면 된다.

수정 전

{
  "name": "vue_single_file_component_test",
  "description": "It is test of single file component",
  "version": "1.0.0",
  "author": "kkamikoon",
  "license": "MIT",
  "private": true,
  "scripts": {
    "dev": "cross-env NODE_ENV=development webpack-dev-server --open --hot",
    "build": "cross-env NODE_ENV=production webpack --progress --hide-modules"
  },
  "dependencies": {
    "vue": "^2.5.11"
  },
  "browserslist": [
    "> 1%",
    "last 2 versions",
    "not ie <= 8"
  ],
  "devDependencies": {
    "babel-core": "^6.26.0",
    "babel-loader": "^7.1.2",
    "babel-preset-env": "^1.6.0",
    "babel-preset-stage-3": "^6.24.1",
    "cross-env": "^5.0.5",
    "css-loader": "^0.28.7",
    "file-loader": "^1.1.4",
    "node-sass": "^4.5.3",
    "sass-loader": "^6.0.6",
    "vue-loader": "^13.0.5",
    "vue-template-compiler": "^2.4.4",
    "webpack": "^3.6.0",
    "webpack-dev-server": "^2.9.1"
  }
}

수정 후

scripts의 dev 부분에 --host 0.0.0.0 --disableHostCheck true를 추가한다.

{
  "name": "vue_single_file_component_test",
  "description": "It is test of single file component",
  "version": "1.0.0",
  "author": "kkamikoon",
  "license": "MIT",
  "private": true,
  "scripts": {
    "dev": "cross-env NODE_ENV=development webpack-dev-server --host 0.0.0.0 --disableHostCheck true --open --hot",
    "build": "cross-env NODE_ENV=production webpack --progress --hide-modules"
  },
  "dependencies": {
    "vue": "^2.5.11"
  },
  "browserslist": [
    "> 1%",
    "last 2 versions",
    "not ie <= 8"
  ],
  "devDependencies": {
    "babel-core": "^6.26.0",
    "babel-loader": "^7.1.2",
    "babel-preset-env": "^1.6.0",
    "babel-preset-stage-3": "^6.24.1",
    "cross-env": "^5.0.5",
    "css-loader": "^0.28.7",
    "file-loader": "^1.1.4",
    "node-sass": "^4.5.3",
    "sass-loader": "^6.0.6",
    "vue-loader": "^13.0.5",
    "vue-template-compiler": "^2.4.4",
    "webpack": "^3.6.0",
    "webpack-dev-server": "^2.9.1"
  }
}

0. Git Address

https://github.com/gothinkster/vue-realworld-example-app.git


gothinkster/vue-realworld-example-app

An exemplary real-world application built with Vue.js, Vuex, axios and different other technologies. This is a good example to discover Vue for beginners. - gothinkster/vue-realworld-example-app

github.com

Vue를 학습하다가, 단일 파일로 테스트(Vue Devtools)로만 작업을 수행하니 실제 개발자들이 어떻게 프로젝트를 개발하고 유지보수 할 수 있는지에 대한 감이 오질 않았다.

이를 좀 더 자세히 알기 위해 vue real world라는 키워드로 검색하여, 위의 git 주소를 얻었다.

처음에는 vue-cli, vue를 설치해둔 상태의 VMware에서 테스트를 해보았는데 잘 되지 않아서 다음과 같은 순서로 다시 진행하였고, 성공적으로 프로젝트가 띄워지는 것을 확인하여 기록하고자 이 포스트를 작성한다.


1. Install Basic Libraries

git install

$ apt install git

npm install

$ apt install npm

yarn install

$ npm install -g yarn

만약 yarn을 설치하고 global에 문제가 발생할 경우 다음과 같은 곳에 환경변수를 설정해줘야 한다.

.profile, .bash_profile, .bashrc, .zshrc 등…

$ export PATH="$PATH:/opt/yarn-[version]/bin"


2. vue real world example download and install

git clone

$ git clone https://github.com/gothinkster/vue-realworld-example-app.git

install editorcnofig globally

$ npm install -g editorconfig

install dependencies

$ yarn install

serve with hot reload at localhost:8080

$ yarn serve


3. 결과

yarn으로 실행된 vue project
구동중인 vue project(with yarn serve)

0. Javascript 자료형

Javscript의 데이터 타입 종류

위와 같은 자바스크립트 데이터 타입이 다양하게 있다.

Javascript 배열을 보고, 생김새는 유사 C언어 같기도 하여 혹시나하는 의문이 생겼다.

이를 하나의 배열에 넣을 수 있는가? 그리고 그것을 출력할 수 있는가? 에 대한 의문이다.


1. Javscript 배열 소스

<html>
    <head>
        <title>Javascript Array Test</title>
    </head>
    <body>
        <!-- No Body Data -->
    </body>

    <script>
        var a = [];
        var i = 0;

        a.push("Data1");
        a.push(1);
        a.push(true);
        a.push(null);

        for(i; i<a.length; i++)
        {
            document.write(a[i] + "    " + typeof(a[i]) + "<br>");
        }
    </script>
</html>


위와 같이 String, Number, Boolean, Null 데이터 타입의 값을 하나의 배열에 넣어주도록 하고, 이를 출력해보았다.


2. 결과

결과 출력 모습

보아하니 하나의 배열에도 잘 들어가는 것 같다.


0. 구동 환경

Ubuntu 19.04.


1. Vue.js 설치 방법

nodejs(npm) 설치(1)

$ apt install nodejs

nodejs(npm) 설치(2)

$ apt install npm

vue 설치

$ npm install vue


2. vue-cli 설치

Vue CLI는 Vue.js 프로젝트 생성을 돕는 vue 공식 CLI이다. Vue CLI를 통해 vue 명령어를 사용할 수 있게 되고, 빠른 프로젝트 생성 및 관리가 가능하다.

vue-cli 설치 방법(1)

$ npm install -g @vue/cli

vue-cli 설치 방법(2)

$ yarn global add @vue/cli

vue 명령 살펴보기

root@ubuntu:~# vue
Usage: vue <command> [options]

Options:
  -V, --version  output the version number
  -h, --help     output usage information

Commands:
  init           generate a new project from a template
  list           list available official templates
  build          prototype a new project
  create         (for v3 warning only)
  help [cmd]     display help for [cmd]


3. vue를 이용한 프로젝트 생성

프로젝트 생성시 vue-cli를 설치해두었으면 생각보다 편하게 설치가 가능하다. 물론 인터넷이 되어야 한다는 전제가 있다.

공식 템플릿을 이용한 프로젝트 생성

$ vue init webpack [my-project-name]

github 저장소에서 프로젝트 가져오기

$ vue init [username/reposigory_name] [my-project-name]


4. vue 프로젝트 실행

프로젝트를 생성하였으면, 간단하게 실행해볼 수 있다.

실행 명령어(1)

$ npm run dev

실행 명령어(2)

$ npm start

npm start와 npm run dev와 같은 명령어로 서버를 구동할 수 있다.

물론 구동된 서버는 기본적으로 로컬호스트에서만 접근이 가능하다.


5. vue 프로젝트 외부에서 접근하기 위한 config 수정

프로젝트를 구동하는 곳은 VMware라는 전제하에 외부의 Windows 환경에서 구동하고 싶었다. 그런데 VMware 내부에서는 접근이 가능하였으나, 외부에서는 접근이 안 되는 것을 확인하여, config 파일이 어딨는지 삽질하면서 다음과 같은 힌트를 얻었다.

root@ubuntu ~/VueJSProject/01 > npm run dev

> 01@1.0.0 dev /root/VueJSProject/01
> webpack-dev-server --inline --progress --config build/webpack.dev.conf.js

 1 10% building modules 3/7 modules 4 active ...dules/webpack/hot/log-apply-result.js

위의 파일에서 build/webpack.dev.conf.js에 config가 있는가 싶어서 살펴보았지만 다른 파일의 내용을 보라고 나타나 있었다. 그리고 좀 더 찾아보니 config 아래에 있는 index.js 파일에서 localhost에 대한 내용을 찾았다.

/* 
config/index.js
*/

'use strict'
// Template version: 1.3.1
// see http://vuejs-templates.github.io/webpack for documentation.

const path = require('path')

module.exports = {
  dev: {

    // Paths
    assetsSubDirectory: 'static',
    assetsPublicPath: '/',
    proxyTable: {},

    // Various Dev Server settings
    //host: 'localhost', // can be overwritten by process.env.HOST
    host: '0.0.0.0'
    port: 8080, // can be overwritten by process.env.PORT, if port is in use, a free one will be determined
    autoOpenBrowser: false,
    errorOverlay: true,
    notifyOnErrors: true,
    poll: false, // https://webpack.js.org/configuration/dev-server/#devserver-watchoptions-```
 

 로딩중 표시 함수


Javascript로 로딩중 표시를 하기 위한 함수는 다양한 방법으로 만들 수 있습니다.

그 중에서 제가 생각하기에 굉장히 괜찮은 함수를 소개해보려고 합니다.


function LoadingWithMask() {
	//화면의 높이와 너비를 구합니다.
	var maskHeight = $(document).height();
	var maskWidth  = window.document.body.clientWidth;
	
	//화면에 출력할 마스크를 설정해줍니다.
	var mask       = "<div id='mask' style='position:absolute; z-index:9000; background-color:#000000; display:none; left:0; top:0;'></div>";
	var loadingImg = '';
	 
	loadingImg += "<div id='loadingImg'>";
	loadingImg += " <img src='LoadingImg.gif' style='position: relative; display: block; margin: 0px auto;'/>";
	loadingImg += "</div>";  
 
	//화면에 레이어 추가
	$('body')
		.append(mask)
		.append(loadingImg)
	   
	//마스크의 높이와 너비를 화면 것으로 만들어 전체 화면을 채웁니다.
	$('#mask').css({
			'width' : maskWidth
			, 'height': maskHeight
			, 'opacity' : '0.3'
	}); 
 
	//마스크 표시
	$('#mask').show();   
 
	//로딩중 이미지 표시
	$('#loadingImg').show();
}


이 함수를 실행하게 되면 여러분이 저장해둔 LoadingImg.gif 파일을 로딩하여 보여줍니다.


 로딩중 표시 제거 함수


로딩중인 표시를 제거해야할 경우에는 다음과 같은 함수를 실행시키면 됩니다.


function closeLoadingWithMask() {
	$('#mask, #loadingImg').hide();
	$('#mask, #loadingImg').remove();  
}


이 함수를 사용하는 예제와 예제 소스를 보시도록 하겠습니다.


 로딩중 예제 소스와 예제


먼저 전체 예제 소스를 먼저 살펴보도록 합시다.

아래의 소스는 예제를 설명하기 위해 조금 각색했습니다.


 예제 소스

<script>
function test(imageName) {
	LoadingWithMask('your site\'s image path');
	setTimeout("closeLoadingWithMask()", 3000);
}

function LoadingWithMask(gif) {
	//화면의 높이와 너비를 구합니다.
	var maskHeight = $(document).height();
	var maskWidth  = window.document.body.clientWidth;
	
	//화면에 출력할 마스크를 설정해줍니다.
	var mask       = "<div id='mask' style='position:absolute; z-index:9000; background-color:#000000; display:none; left:0; top:0;'></div>";
	var loadingImg = '';
	 
	loadingImg += " <img src='"+ gif + "' style='position: absolute; display: block; margin: 0px auto;'/>";

	//화면에 레이어 추가
	$('body')
		.append(mask)

	//마스크의 높이와 너비를 화면 것으로 만들어 전체 화면을 채웁니다.
	$('#mask').css({
			'width' : maskWidth,
			'height': maskHeight,
			'opacity' : '0.3'
	}); 
 
	//마스크 표시
	$('#mask').show();
 
	//로딩중 이미지 표시
	$('#loadingImg').append(loadingImg);
	$('#loadingImg').show();
}

function closeLoadingWithMask() {
	$('#mask, #loadingImg').hide();
	$('#mask, #loadingImg').empty();  
}


 예제


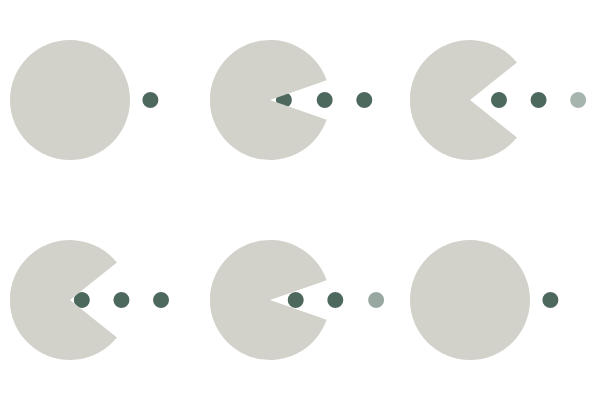
 예제에 쓰인 그림 파일


스피너(Pacman)


팩맨(Pacman)


위지스(Wedges)


해당 이미지들은 아래의 사이트에서 얻을 수 있었습니다.


Loading.io 링크

Python Flask 혹은 Django를 사용하게 되면 HTML에 Jinja2 문법을 사용하여 추가적인 작업을 수행할 수 있습니다.

여기서 Jinja2의 For문을 사용하는 방법을 알아보도록 하겠습니다.


Jinja2를 사용할 때 Python Flask로 다음과 같이 작성했다고 합시다.


예제 소스

@app.route('/', method=['GET'])
def hello_kkamikoon():
    myList = []
    for i in range(0, 10):
        myList.append('count : %d' % i)
    
    return render_template('/app/templates/hello_kkamikoon.html', myList=myList)


위의 파이썬 소스를 실행시켰다는 가정하에 이제 HTML 소스를 보시겠습니다.


<!--source name : hello_kkamikoon.html -->
<!--source dir : /app/templates/hello_kkamikoon.html -->

<html lang="ko">
  <head>
    <title>kkamikoon Jinja2 for</title>
    >
  </head>
  <body>
    <ul>
	  {% for ml in myList %}
	  <li> {{ml}} </li>
	  {% endfor %}
    </ul>
  </body>
</html>


결과

<!--source name : hello_kkamikoon.html -->
<!--source dir : /app/templates/hello_kkamikoon.html -->

<html lang="ko">
  <head>
    <title>kkamikoon Jinja2 for</title>
    >
  </head>
  <body>
    <ul>
	  <li> count : 0 </li>
	  <li> count : 1 </li>
	  <li> count : 2 </li>
	  <li> count : 3 </li>
	  <li> count : 4 </li>
	  <li> count : 5 </li>
	  <li> count : 6 </li>
	  <li> count : 7 </li>
	  <li> count : 8 </li>
	  <li> count : 9 </li>
    </ul>
  </body>
</html>


myList에 있는 값이 그대로 html로 옮겨져서 반복되는 것을 볼 수 있습니다.


01. onchange 함수

문법 

<element onchange="myScript">


onchange 함수는 우리가 작성한 Javascript를 통해 변화가 일어났는지 탐지해줍니다.


예제 소스

<input type="text" value="hello" onchange="bgcolor_yellow(this)" />
<input type="text" value="world" onchange="bgcolor_yellow(this)" />

<script>
function bgcolor_yellow(obj) {
  obj.style.backgroundColor = 'yellow';
}
</script>


결과


02. onchange 함수 응용

예제 소스

<select id="TestSelect" name="SelectValue" onchange="chageLangSelect()">
<option value="" selected disabled>Choose your value</option>              
<option value="val01">YourValue01</option>
<option value="val02">YourValue02</option>
</select>

<script>
function chageSelectedValue(){
    var yourTestSelect = document.getElementById("TestSelect");
     
    // select element에서 선택된 option의 value가 저장됩니다.
    var selectedValue = yourTestSelect.options[yourTestSelect.selectedIndex].value;
 
    // select element에서 선택된 option의 text가 저장된다.
    var selectedText = yourTestSelect.options[yourTestSelect.selectedIndex].text;
}
</script>


9번 라인에서 'TestSelect'라는 아이디를 가진 element를 yourTestSelect에 저장합니다.

그리고 변경할 때 해당 element의 option 번째를 고른다면, 선택한 value와 text로 값이 변경되도록 하는 예제입니다.

여기서 var selectedValue와 selectedText는 크게 역할이 없습니다.


결과


+ Recent posts